Overview of the DYMO LetraTag LT-100H Manual
The manual provides comprehensive guidance on setup, features, and troubleshooting for the DYMO LetraTag LT-100H label maker, ensuring efficient use for home and office labeling needs.
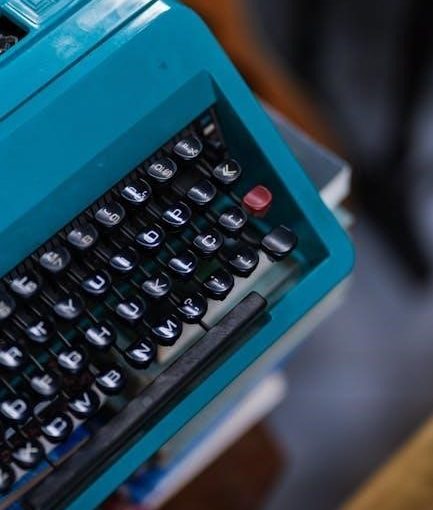
The DYMO LetraTag LT-100H is a portable, user-friendly label maker designed for versatile labeling needs. It supports 12mm and 9mm label cassettes, offering various font sizes, styles, and materials. With a compact design and battery operation, it is ideal for home, office, or on-the-go use. The device features a clear display, easy navigation, and compatibility with multiple label types, making it a practical solution for organizing tasks efficiently. Its intuitive interface ensures quick and precise label creation, catering to both personal and professional use cases.
Key Features and Specifications
The DYMO LetraTag LT-100H is a lightweight, portable label maker weighing 0.28 kg with a plastic body. It features a backlit display for visibility, uses 12mm and 9mm label cassettes, and supports various label materials like paper and nylon. The device operates on batteries, ensuring wireless convenience, and includes a built-in keyboard for easy typing. Its compact design and compatibility with both Windows and Mac systems make it versatile for home or office use. The label maker also offers adjustable font sizes and styles, enhancing customization options for users.
Purpose and Target Audience
The DYMO LetraTag LT-100H is designed for efficient label creation, ideal for home, office, and small business environments. Its portability and user-friendly interface make it suitable for organizing tasks, filing, and labeling products. Perfect for individuals needing quick, customizable labels, it caters to professionals and DIY enthusiasts alike, providing a reliable solution for various labeling needs without requiring advanced technical skills.

Getting Started with the DYMO LetraTag LT-100H
Unpack the device, insert batteries, and install the label cassette. Power on and follow the quick start guide to begin creating labels effortlessly.
Unpacking and Initial Setup
When you unbox the DYMO LetraTag LT-100H, you’ll find the label maker, a user manual, and a starter label cassette. Ensure all components are included and undamaged. The device features a compact, lightweight design with a backlit display for easy navigation. Before first use, familiarize yourself with the control panel and layout. Gently remove any protective covering from the screen and ensure the device is fully assembled. If you’re new to label makers, the manual provides a quick start guide to help you get acquainted with the basics of operation.
Inserting Batteries
To power the DYMO LetraTag LT-100H, insert 4 AA batteries into the battery compartment located on the back of the device. Open the compartment by sliding it downward and lifting the cover. Place the batteries inside, ensuring the positive (+) and negative (-) terminals align correctly. Close the compartment securely. The device features an auto-shutoff function to conserve battery life when not in use. Batteries are not included with the label maker, so ensure you have high-quality AA batteries ready for installation before first use.
Installing the Label Cassette
To install the label cassette in the DYMO LetraTag LT-100H, open the cassette compartment by lifting the top cover. Align the cassette with the guides inside the compartment and gently push it in until it clicks. Ensure the label tape is properly seated and the edges are aligned. Close the compartment securely to ensure proper printing. The label maker supports DYMO LetraTag LT 12mm cassettes, offering various label tape options, including paper and nylon materials, to suit different labeling needs. Proper installation is essential for optimal performance.
Basic Operations of the DYMO LetraTag LT-100H
This section covers essential functions like selecting language, setting date/time, and printing your first label. It ensures smooth operation of the portable DYMO LetraTag LT-100H label maker.
Selecting the Language
Selecting the language on the DYMO LetraTag LT-100H is straightforward. Press the Menu button, navigate to Language using the arrow keys, and choose your preferred option. The device supports multiple languages, ensuring compatibility for global users. Once selected, confirm your choice to save the settings. This feature allows for personalized use, catering to diverse linguistic needs; The manual provides clear steps to guide you through the process effortlessly.
Setting the Date and Time
To set the date and time on the DYMO LetraTag LT-100H, access the Menu by pressing the appropriate button. Use the arrow keys to navigate to the Date and Time option and select it. Enter the correct date and time using the keyboard. Press OK or the confirm button to save your settings. This feature ensures your labels can include accurate timestamps, making organization easier. Follow the on-screen prompts for a seamless setup process.
Printing Your First Label
To print your first label, ensure the DYMO LetraTag LT-100H is turned on and the label cassette is properly installed. Type your desired text using the built-in keyboard. Use the navigation keys to adjust font size or style if needed. Press the Print button to start printing. The device will automatically feed and cut the label. This process is straightforward, allowing you to create labels quickly and efficiently for various tasks. Follow the on-screen instructions for a smooth first-time printing experience.

Label Customization Options
The DYMO LetraTag LT-100H offers various customization options, including multiple font sizes, styles, and label cassette types. Users can choose from different tape sizes and materials for versatility.
Choosing Font Sizes and Styles
The DYMO LetraTag LT-100H allows users to select from various font sizes and styles to customize labels. With options for bold text and uppercase letters, it enhances readability and visual appeal. The device supports multiple font styles, enabling users to tailor labels for different purposes. Using the built-in keyboard and navigation buttons, users can easily switch between font sizes and styles. This feature ensures labels are both functional and visually consistent, making it ideal for organizing and identifying items effectively. The backlit display helps preview font selections before printing.
Using Different Label Cassette Types
The DYMO LetraTag LT-100H supports various label cassette types, including 12mm (1/2 inch) and 9mm (3/8 inch) widths. These cassettes are available in different materials, such as paper, nylon, and vinyl, offering versatility for indoor or outdoor use. Users can easily switch between cassettes to suit their labeling needs. The device is compatible with DYMO LetraTag LT cassettes, ensuring high-quality prints. This feature allows for customization of labels based on durability requirements, making it ideal for various applications, from office organization to industrial labeling.
Understanding Label Tape Sizes and Materials
The DYMO LetraTag LT-100H uses 12mm (1/2 inch) and 9mm (3/8 inch) label tapes, available in various materials like paper, nylon, and vinyl. Paper tapes are ideal for temporary labels, while nylon and vinyl offer durability for outdoor or industrial use. The tapes come in lengths of up to 3.5 meters, providing ample labeling capacity. Users can choose materials based on specific needs, such as water resistance or adhesive strength. This versatility ensures labels can be customized for different environments and applications, from home organization to professional settings.
Advanced Features of the DYMO LetraTag LT-100H
The device offers advanced features like special characters, adjustable display settings, and a built-in keyboard for efficient and customizable label creation, enhancing user experience and productivity.
Using Special Characters and Symbols
The DYMO LetraTag LT-100H allows users to enhance labels with special characters and symbols, adding versatility to their creations. Access these by navigating through the menu options, where a variety of icons and punctuation marks are available. This feature is particularly useful for creating visually appealing and professional-looking labels. Simply select the desired symbol using the keyboard or on-screen menu, and it will be printed alongside your text. This functionality makes the device ideal for both practical and decorative labeling needs, ensuring your labels stand out with unique designs and emphasis.
Adjusting the Display Settings
The DYMO LetraTag LT-100H features an LCD display that can be customized for optimal visibility. Users can adjust the contrast to improve readability in different lighting conditions. Additionally, the backlit display offers better visibility in low-light environments. To conserve battery life, the device includes an auto-shutoff feature that turns off the display after a period of inactivity. These settings can be easily accessed through the device’s menu, allowing users to tailor the display to their preferences and ensure efficient operation. This customization enhances the overall user experience and productivity.
Utilizing the Built-in Keyboard
The DYMO LetraTag LT-100H features a built-in QWERTY keyboard designed for intuitive and efficient label creation. Users can quickly type text, access special characters, and navigate through menu options with ease. The keyboard’s responsive design ensures accurate input, reducing errors and saving time. By utilizing the keyboard, users can create professional-looking labels tailored to their needs, making it ideal for both home and office use. This feature enhances productivity and streamlines the labeling process, providing a seamless experience for users of all skill levels.

Troubleshooting Common Issues
The manual helps resolve common issues like printing problems, battery life drainage, and cassette installation errors, ensuring smooth operation and extending the device’s longevity.
Resolving Printing Problems
Common printing issues with the DYMO LetraTag LT-100H include labels not printing, blurry text, or misaligned prints. Ensure the label cassette is properly installed and the print head is clean. Use a soft cloth to gently wipe the print head. Check that the cassette is not empty or damaged. Verify battery levels, as low power may cause printing errors. If issues persist, restart the device or replace the cassette. Proper maintenance and regular cleaning can prevent recurring problems and ensure high-quality label printing. Always refer to the manual for detailed troubleshooting steps.
Fixing Battery Life Issues
To address battery life concerns with the DYMO LetraTag LT-100H, ensure you use fresh, high-quality batteries. Turn off the device when not in use to conserve power. The label maker features an auto-off function, which activates after inactivity. Clean the battery contacts periodically to maintain proper connectivity. Avoid exposing the device to extreme temperatures, as this can drain battery life. Replace batteries promptly when low-power indicators appear. Using rechargeable batteries or ensuring proper installation can also enhance performance and extend usage. Refer to the manual for detailed battery care instructions.
Addressing Cassette Installation Errors
Ensure the label cassette is compatible with the DYMO LetraTag LT-100H, which supports 12mm (1/2 inch) and 9mm (3/8 inch) cassettes. Open the cassette compartment and remove any existing cassette. Carefully insert the new cassette, aligning it properly, until it clicks into place. Close the compartment gently to avoid misalignment. If issues persist, restart the device. Check for any obstructions or damaged cassette parts. Refer to the manual for detailed cassette installation steps to resolve errors effectively and ensure smooth printing operation.

Maintenance and Care
Regularly clean the DYMO LetraTag LT-100H to prevent dust buildup. Replace the print head when print quality declines. Store the device in a dry, cool place when not in use. Use only genuine DYMO cartridges to ensure optimal performance and longevity. Check the cassette compartment for obstructions to maintain smooth operation.
Cleaning the Label Maker
Regular cleaning ensures optimal performance and prevents dust buildup. Turn off the device and remove batteries before cleaning. Use a soft, dry cloth to wipe the exterior and internal components. For the print head, gently clean with a cotton swab. Avoid using liquids or harsh chemicals, as they may damage the machine. Clean the cassette compartment to ensure smooth label feeding. Regular maintenance helps maintain print quality and extends the device’s lifespan. Refer to the manual for detailed cleaning instructions to keep your DYMO LetraTag LT-100H in excellent condition.
Replacing the Print Head
To replace the print head, first turn off the device and remove the batteries. Open the cassette compartment and carefully remove the existing print head. Gently pull it out and discard. Insert the new print head, ensuring it clicks into place securely. Replace the cassette and batteries, then test the device by printing a label. This process maintains print quality and extends the life of your DYMO LetraTag LT-100H. Always use genuine DYMO replacement parts for optimal performance and durability.
Storing the Device Properly
To ensure the longevity of your DYMO LetraTag LT-100H, store it in a cool, dry place away from direct sunlight. Remove the batteries when not in use for an extended period to prevent corrosion. Use a protective case to shield the device from dust and physical damage. Keep the label maker upright to maintain balance and prevent internal components from shifting. Regularly clean the device before storage to remove any debris. Proper storage ensures the label maker remains in optimal condition and ready for use when needed.